01sqoop
本文最后更新于 2021-08-05 11:42:59
Sqoop
sqoop目的是完成从关系型数据库导入数据或者是导出数据到关系型数据库
核心是将命名转换为MR,但是没有Reduce阶段
官方文档:https://sqoop.apache.org/docs/1.4.7/SqoopUserGuide.html
安装sqoop
- 下载sqoop编译好的版本
- 解压
- 在sqoop-env.sh或/etc/profile中配置 HADOOP_HOME,HIVE_HOME,HBASE_HOME,ZOOKEEPER_HOME
- 添加数据库驱动,例如mysql-connector到sqoop/lib中
- 测试连接
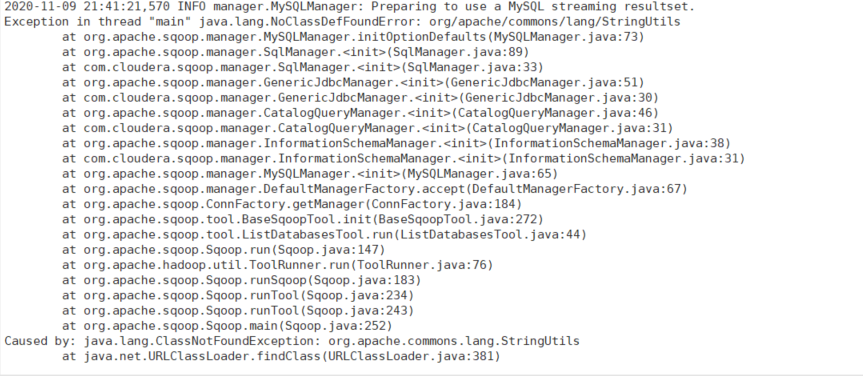
bin/sqoop list-databases --connect jdbc:mysql://node1:3306/ --username root --password 123456 - 报错解决 更换commons-lang3-3.4为commons-lang-2.6
导入数据到hadoop
导入数据到hdfs
bin/sqoop import \
--connect jdbc:mysql://node1:3306/mydb \                #指定数据库
--username root \                                       #数据库用户名
--password 123456 \                                     #数据库密码
--table t_emp \                                         #从数据库哪个表导入
--target-dir /t_emp \                                   #导出到hdfs目录
--delete-target-dir \                                   #如果已经存在目录,是否清空
--fields-terminated-by "\t" \                           #字段的分割符
--num-mappers 2 \                                       #指定map数量
--split-by id \                                         #基于哪个指端分片给mapper,在指定map数量大于1时指定,尽量不指定有null或中文字段
--columns age,name \                                    #指定只导入某些列,默认所有
--where 'id >= 5 and id <= 10'                          #可以添加过滤条件
bin/sqoop import \ #
--connect jdbc:mysql://node1:3306/mydb \
--username root \
--password 123456 \
--query "select * from t_emp where \$CONDITIONS and id >=2" \ #--query与where,columns,table互斥,在sql中需指定$CONDITIONS会被sqoop替换为一些表达式
--target-dir /t_emp \
--delete-target-dir \
--fields-terminated-by "\t" \
--num-mappers 2 \
--split-by id导入到hive
该过程分为两步,第一步将数据导入到HDFS,第二步将导入到HDFS的数据迁移到Hive仓库
bin/sqoop import \
--connect jdbc:mysql://node1:3306/mydb \
--username root \
--password 123456 \
--table t_emp \
--num-mappers 1 \
--hive-import \                                            # 指定导入到hive
--fields-terminated-by "\t" \                              # 分隔符
--hive-overwrite \                                         # 是否以insert overwrite方式覆盖导入数据
--hive-table t_emp                                         # 要导入的hive表的名称,会自动帮助我们建表。建议还是在hive中手动建表,需要注意和mysql表的数据类型匹配
导入到hbase
bin/sqoop import \
--connect jdbc:mysql://node1:3306/mydb \
--username root \
--password 123456 \
--table t_emp \
--hbase-create-table \                          # 是否自动创建表
--hbase-table "t_emp" \                         # 指定表名
--hbase-row-key "id" \                          # 指定rowkey
--column-family "info" \                        # 指定列族
--num-mappers 1
导出到关系型数据库
bin/sqoop export \
--connect 'jdbc:mysql://node1:3306/mydb?useUnicode=true&characterEncoding=utf-8' \
--username root \
--password 123456 \
--table t_emp2 \                           # 导出的表名,不存在会自动创建
--num-mappers 1 \                          # 指定mapper数
--export-dir /t_emp \                      # 指定从哪个路径导出
--update-key id \
--update-mode  allowinsert \
--input-fields-terminated-by "\t"

# update-key没有指定时,当遇到键冲突,就会执行失败
# 指定update-key而update-mode默认指定为updateonly 相当于执行update操作,只更新,无法新插入
# 指定update-key而update-mode指定为allowinsert 相当于有键冲突就更新,没有就插入
# 相当于MYSQL中 -> INSERT INTO t_emp2 VALUE(1,"kk",1,1,1) ON DUPLICATE KEY UPDATE
# name=VALUES(name),age=VALUES(age),deptid=VALUES(deptid),empno=VALUES(empno)01sqoop
https://jiajun.xyz/2020/11/09/bigdata/06sqoop/01sqoop/